|
This post is all about a three day workshop "Portrait painting from a photograph" that I participated in this past weekend. It is mainly for you painters out there, a bit technical but I'll be succinct. This is a brief overview of what Kristy had to share and an encouragement for you to take in one of her workshops if it seems of interest to you. Those who are aware of my preference for painting from life may be surprised at my enthusiasm for this process. I am a big admirer of Kristy's work and as she is based in New York there will not many opportunities for me to take advantage of her teaching sessions so regardless of the subject I believed that I could glean some knowledge from Kristy and I did and was happy to attend. If you are not familiar with Kristy Gordon take a look at her website http://kristygordon.com/ Day One: Preparation of the substrate began with a liberal coating of gesso tinted with yellow ochre and mars black. Once our surface was coated we were instructed to smooth out all brush marks using the flat of our gloved hand. Set to dry - takes about 20 minutes. Once dry, lightly sand smooth being careful to avoid removing your ground where it is stressed by the stretcher bars. Clean off the dust and you have a porcelain-like smooth greenish surface. Next we transferred our chosen subject to the painting surface. We prepared for the workshop by having a same size photograph printed onto standard stock paper. Using our gloved fingers we coated the back side of the photocopy with non-thinned burnt umber. Next we laid the copy painted side down onto our canvas, taped it in place and traced the image with a pencil. When the paper is removed we were left with a proportionally accurate (if your photo is) line drawing. Okay, I admit this process was counter intuitive for me after all the effort I've put into learning to paint directly but it certainly is a good way to get a beginning subject onto your canvas quickly which is an advantage in a short workshop. So ethical snobbery aside I pressed on. Selecting our values as we laid in a design with burnt umber. At the end of the first session you can see my painting taking shape. 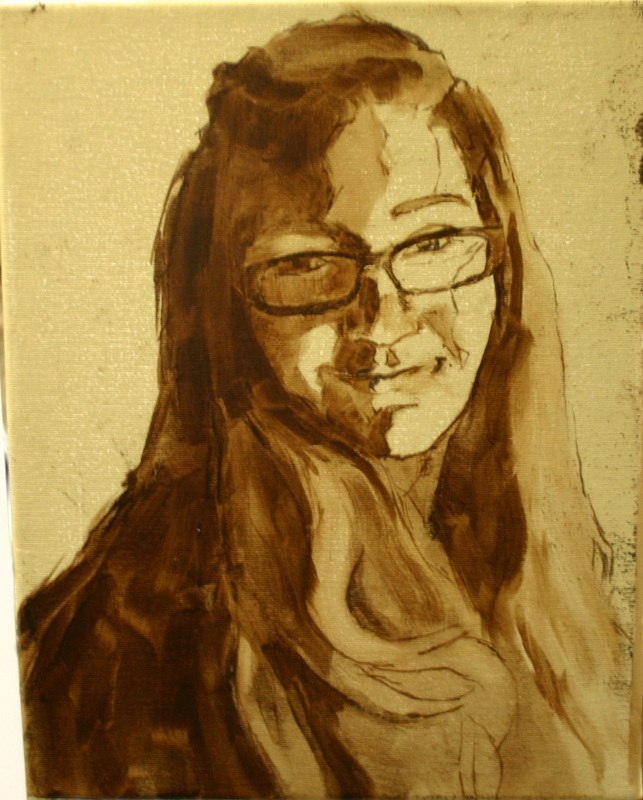 Settling our paintings aside we used the last half hour of the session to lay out our colour palette for day two. This was the fullest spectrum I've ever used and although I did not exploit each colour fully it was worthwhile to have them to experiment with. 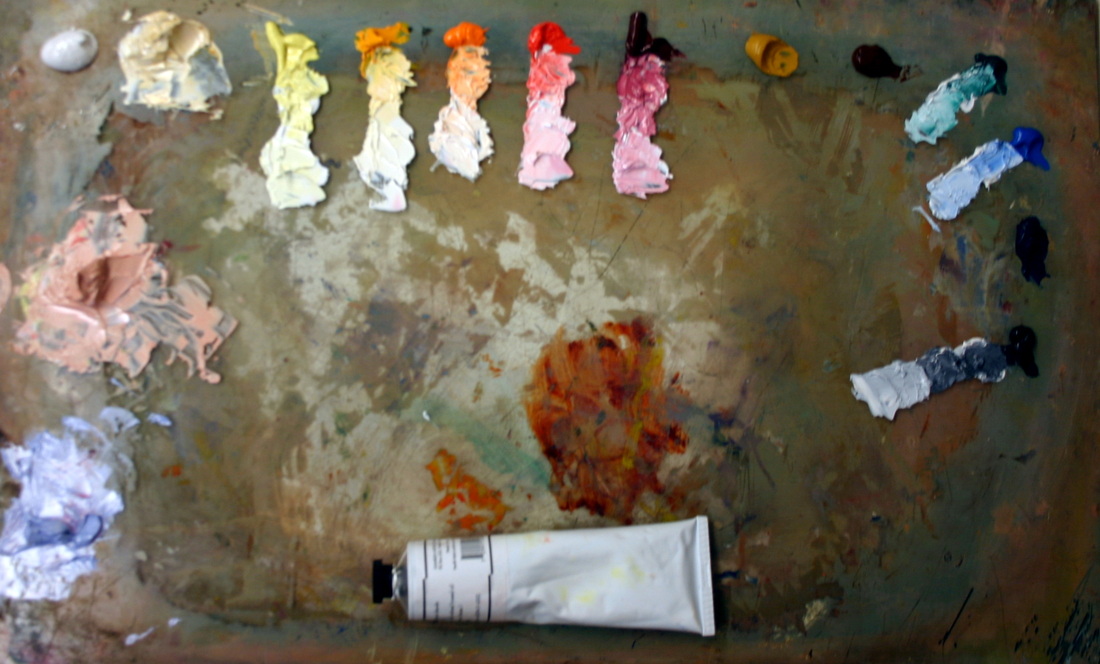 Starting at bottom left and moving clockwise: A Jeremy Lipking inspired cool flesh colour consisting of Titanium White, Ultramarine Blue and Alizarin Permanent. A JL inspired warm flesh tone consisting of Titanium White, Lemon Yellow, Cad Red Light, Alizarin Permanent and Lipking cool flesh colour. Titanium White White and Yellow Ochre Lemon Yellow Cad Yellow Cad Orange Cad Red Light Alizarin Permanent Yellow Ochre Burnt Sienna Viridian Green Cobalt Blue UltraMarine Blue Mars Black You can see which ones were partially mixed with a thread of white giving plenty of colour selection. Day Two: Armed with our full colour palette we laid in all skin areas that were lighted while trying to separate cool and warm, lighter and darker values all within these lit areas only. After that we laid in our shaded colours again attempting to create visual interest with different temperatures and values within our shaded areas. 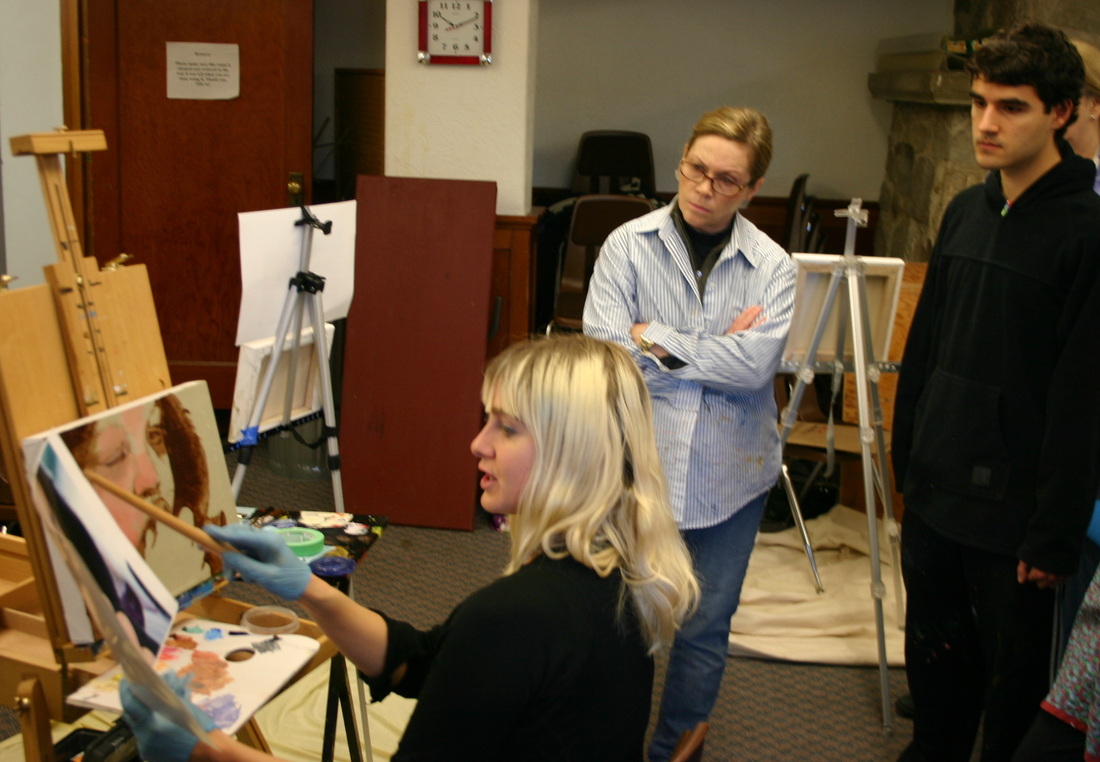 Kristy was very gracious with support and demos when needed. She runs a very non threatening workshop which allows for painters of all levels to advance. Great reminders to always think about colours cooling off as they retreat around forms, to soften most edges between transitions of values, to place hard edges to amplify important sections and much more. She gave a demo on painting hair, eyebrows and lashes.  Great fun was had by all. There was no alcohol consumed in the filming of this workshop (to my knowledge). My painting at the end of day two below. 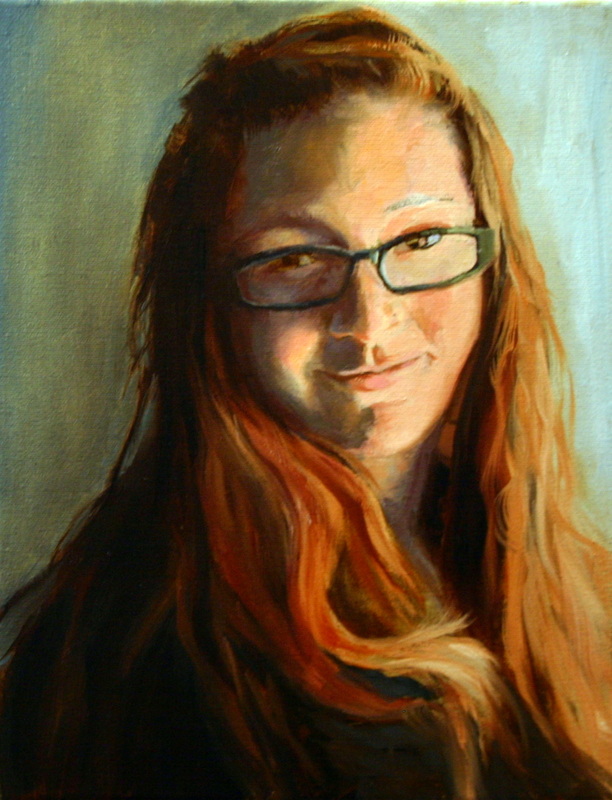 Day three: There was good advice on describing different parts of the anatomy correctly (by correctly I mean classically representational as opposed to subjectively stylized). Kristy demonstrated methods of dealing with the eyes, nose and mouth. These short talks were personally quite benificial. In my solitude I do tend towards painting everything as a shape,a colour and a value without always understanding why things appear as they do, for example why the shaded side of the eye holds the most exciting colour. Great stuff! The whole process was worthwhile and I enjoyed painting on a smoothly prepped surface with, yes, even smaller brushes. I even had to pull out some reading glasses for a few passages. At the end of day three my painting looked like this.  Well, sort of. Not a great photo but you get the drift. There are some very nuanced colours here that really please my sensibilities. I will paint through some passages again when they dry as things got muddy particularly in the shaded background. The burnt umber mixed into some lovely blue which turned to muck. I will post the finish later. Well, that's it for today's post. Do check out Kristy's website for future workshops. 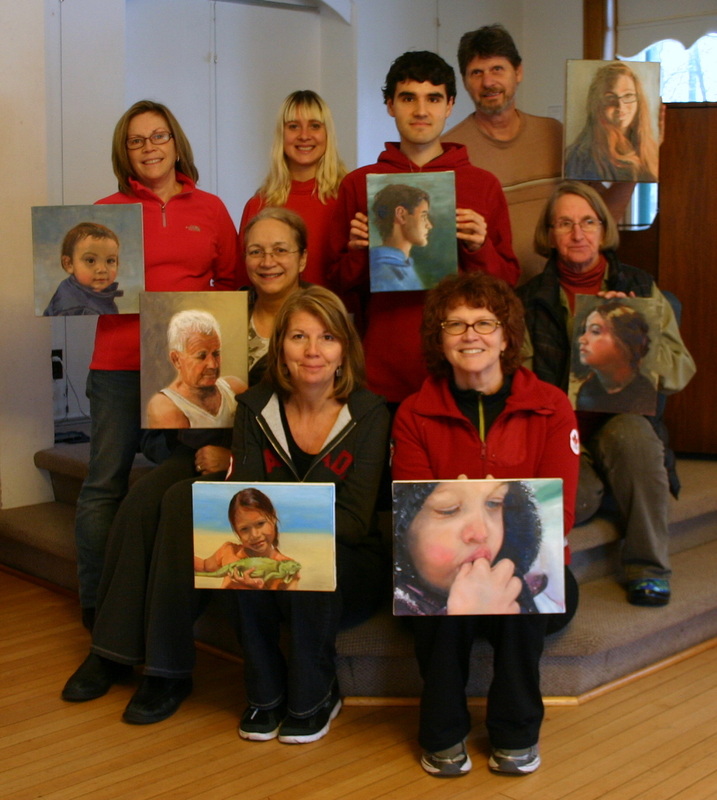
0 Comments
|
CategoriesArchives
July 2017
|
 RSS Feed